¶ Products
The products section is where you can add, edit and delete products.
¶ Add new products
Add a product by clicking New in the top right. Complete the fields in the modal and click Save. The only required fields to create a product are:
- Product number (aka SKU)
- Unit of measure
- Type
- Product (aka Finished Good)
- Variant - Source (aka Variant Parent)
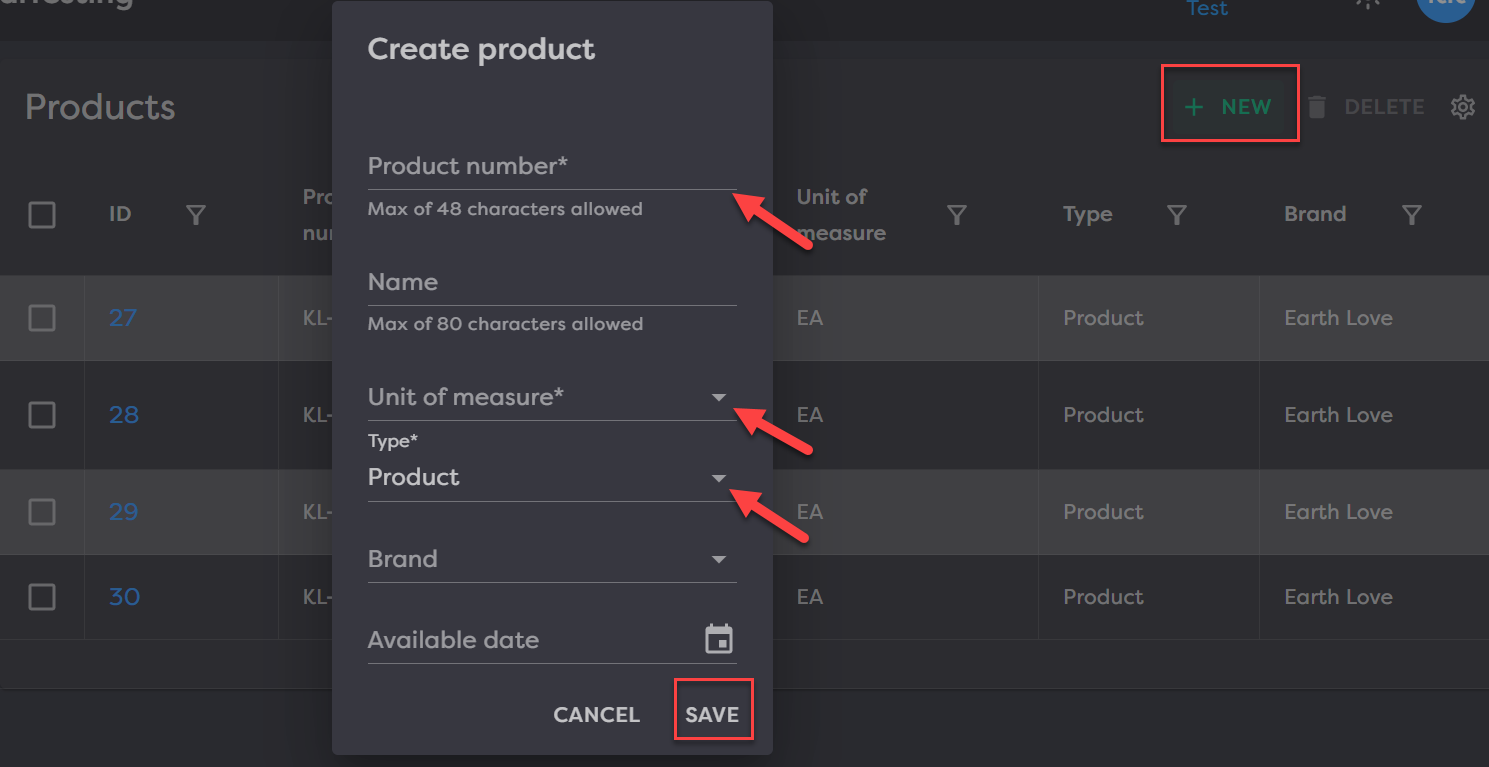
This will create a new product that you can now click into to add additional information, attributes and pricing.
¶ Edit products
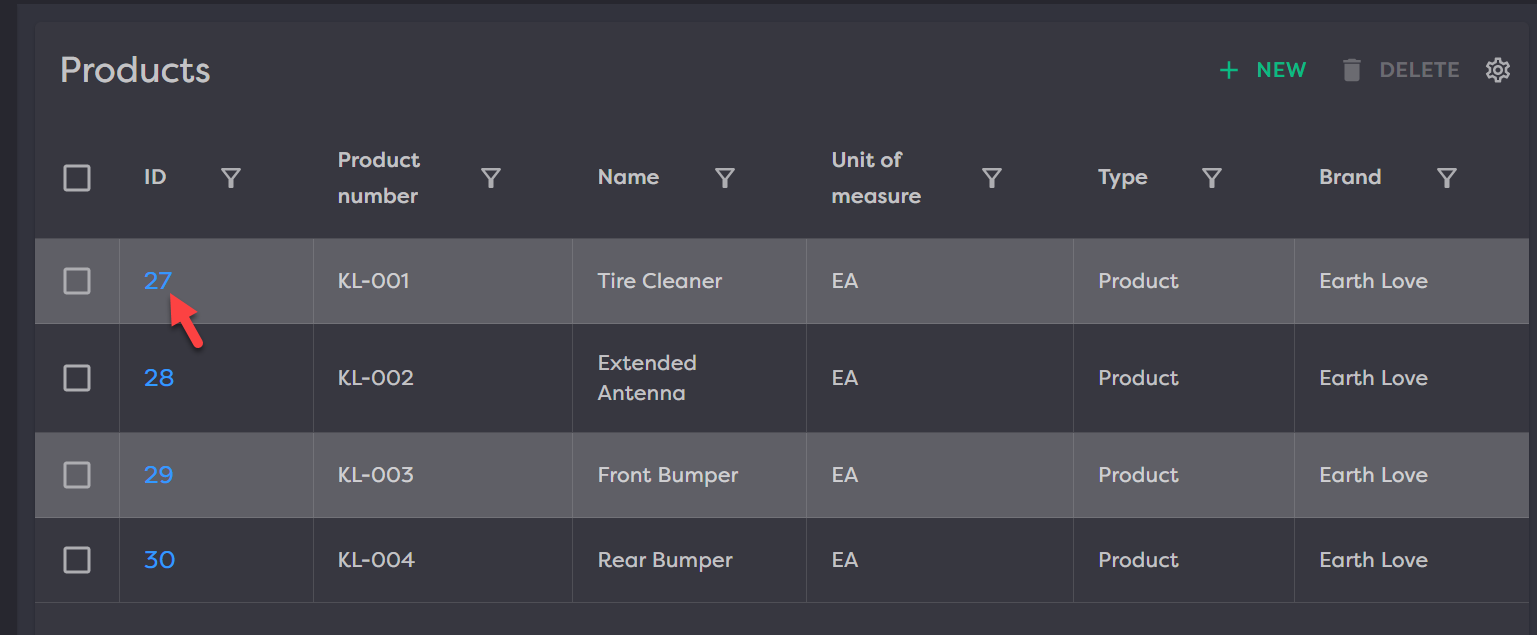
To edit product details, click the hyperlinked ID number to go into the product to add additional information, attributes, pricing, etc.
Once in a product, you have some information in the header and then several collapsed sections where you can add/edit information. Adding/editing information in the header will enable the Save/Cancel buttons. You must save after editing this area or your changes will be lost when you navigate away from the page.
To open the collapsed sections, click the down carrot to the right of the screen per section.
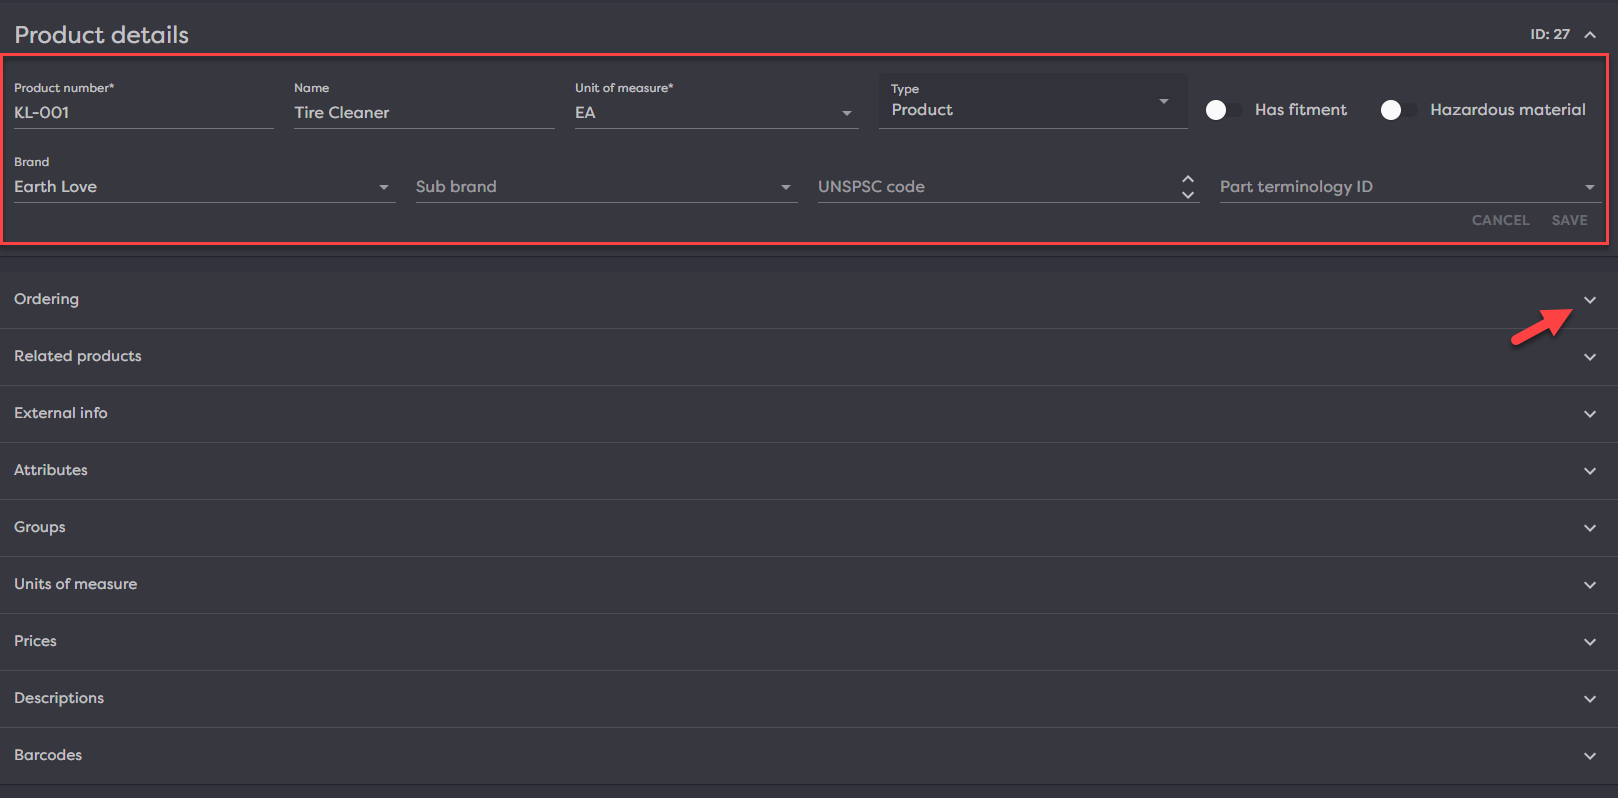
Each section of the product can be expanded and added to from the UI. These sections include:
- Ordering
- Related products
- External Info
- Attributes
- Groups
- Units of Measure
- Prices
- Descriptions
- Barcodes
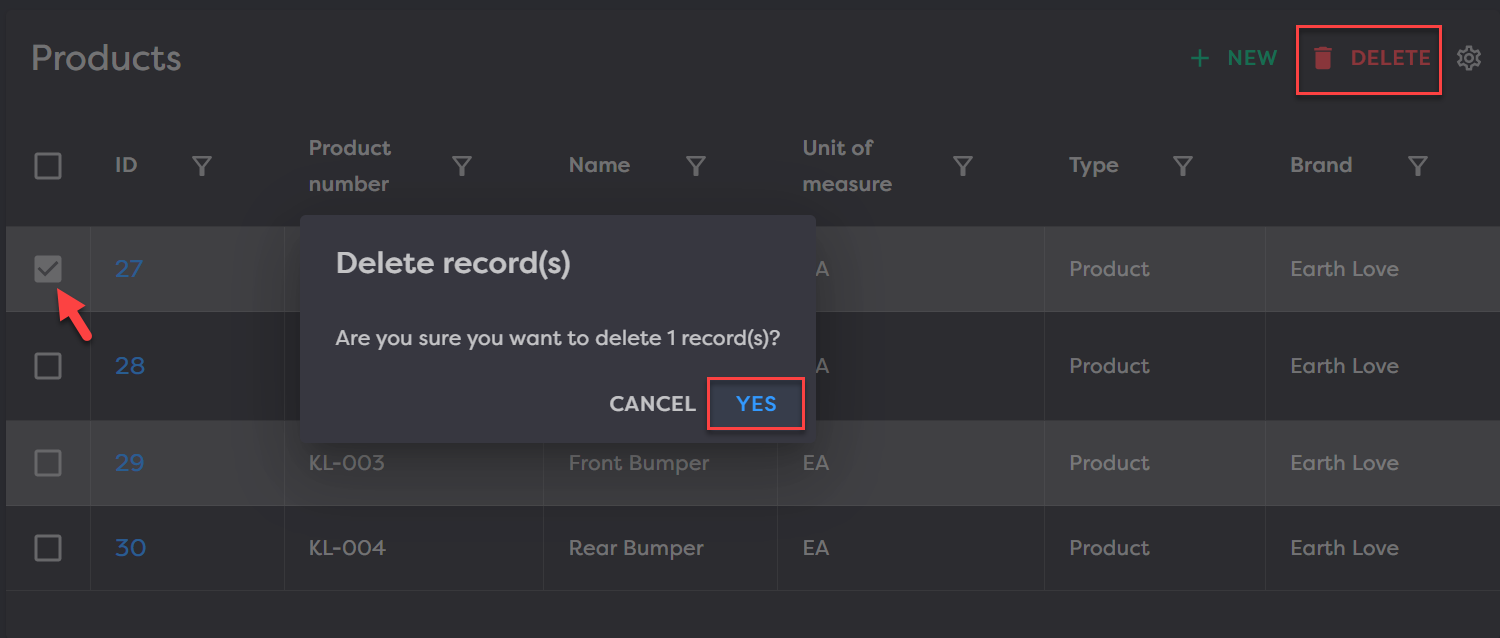
¶ Delete products
To delete, select a product or multiple products by clicking the checkbox in the first column and click Delete in the top right. Then confirm the delete by selecting Yes in the Delete Records modal.
¶ Product Groups
Groups can be used to define one or more hierarchies for use in export or external systems in a variety of ways, including but not limited to:
- Setting up categories for a storefront
- Creating attributes that can be inherited down to products
- Setting up a sync flag to an external system
- And the list goes on…
- Define group (Id/description)
- Associate attributes with groups (0 to many)
- Associate child groups (0 to many)
- Associate products (0 to many)
¶ Groups
To set up a group you have two fields to consider:
- Product group ID : Allows you to name your group (Required)
- Description : Allows you to provide more details about what this group is for (Optional)
Navigate to groups by going to Catalog > Product groups > Groups > click New in the top right to get started.
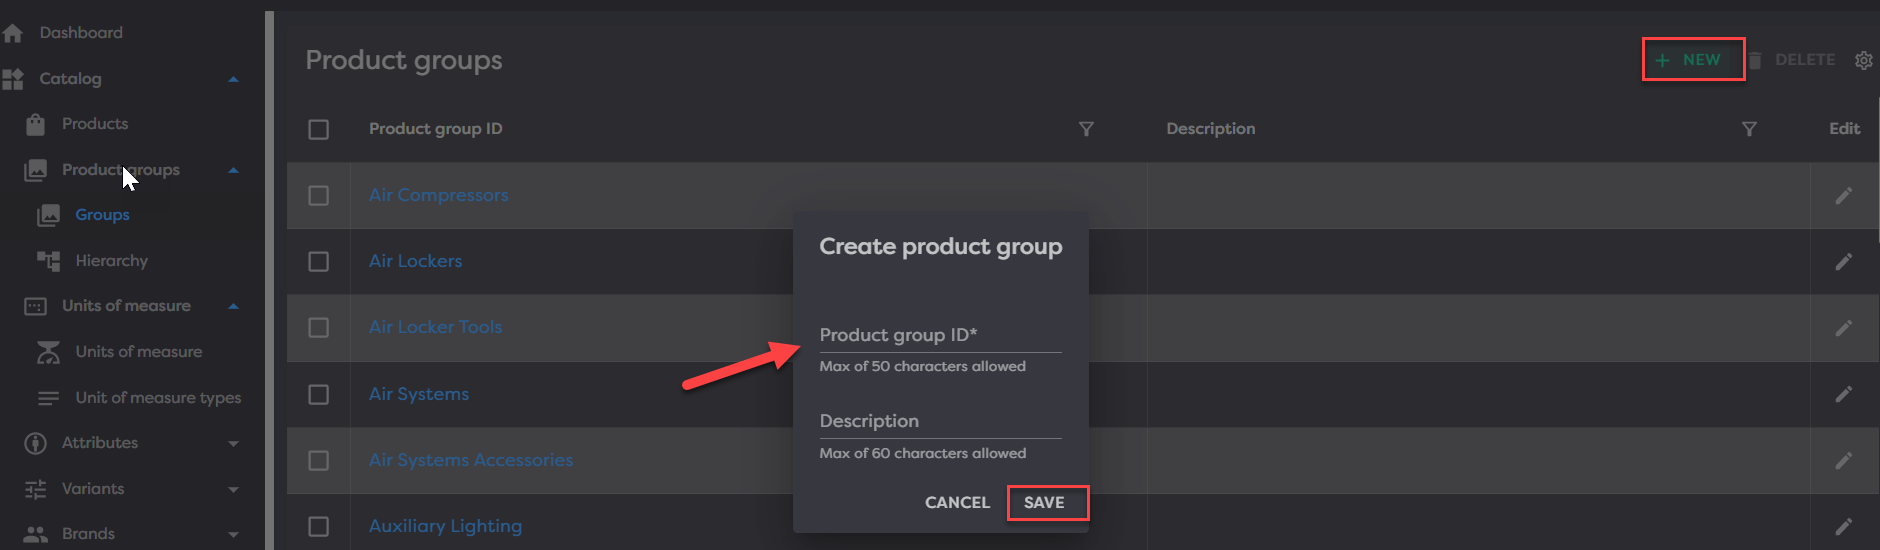
From here, add your Product group ID and click Save.
¶ Hierarchy
hhh…
¶ Units of Measure
Units of measure is where you will want to house any measurement that your data uses. For example, if you use inches for dimensions or ounces for weight, this would be captured here.
¶ Units of measure
Navigate here by going to Catalog > Units of measure > Units of measure > click New in the top right. Then name your attribute to match how the data is structured. You may optionally add a description and the PIES two-letter ID if you would like.

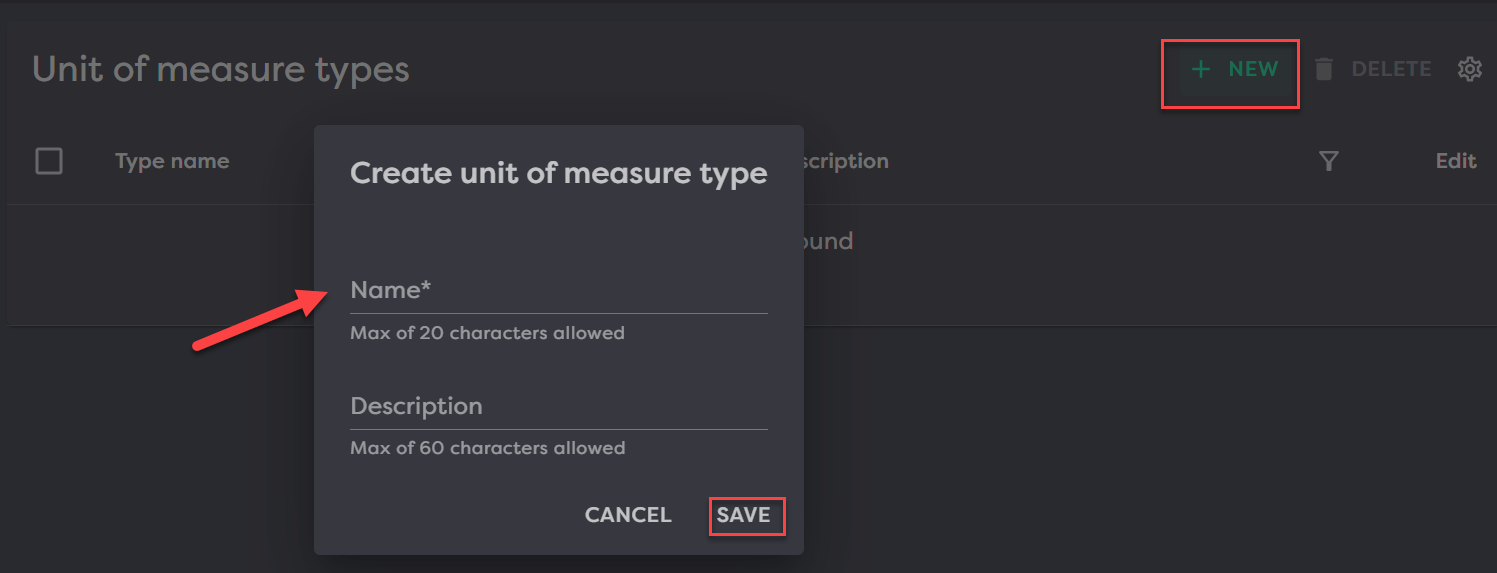
¶ Unit of measure types
Unit of measure types can be used in a variety of ways. A common use case would be creating Standard and Metric types in the event you store both per product for something like weight or dimensions.
Navigate here by going to Catalog > Units of measure > Units of measure types > click New in the top right. Then name your type and put in an optional descritpion.
¶ Attributes
Attributes can set on a Product, Group, or Brand within Product Desk. Attributes in general are separated between their set-up and their values. The attribute setup is used to define the configuration of the attribute.
¶ Attribute Setups
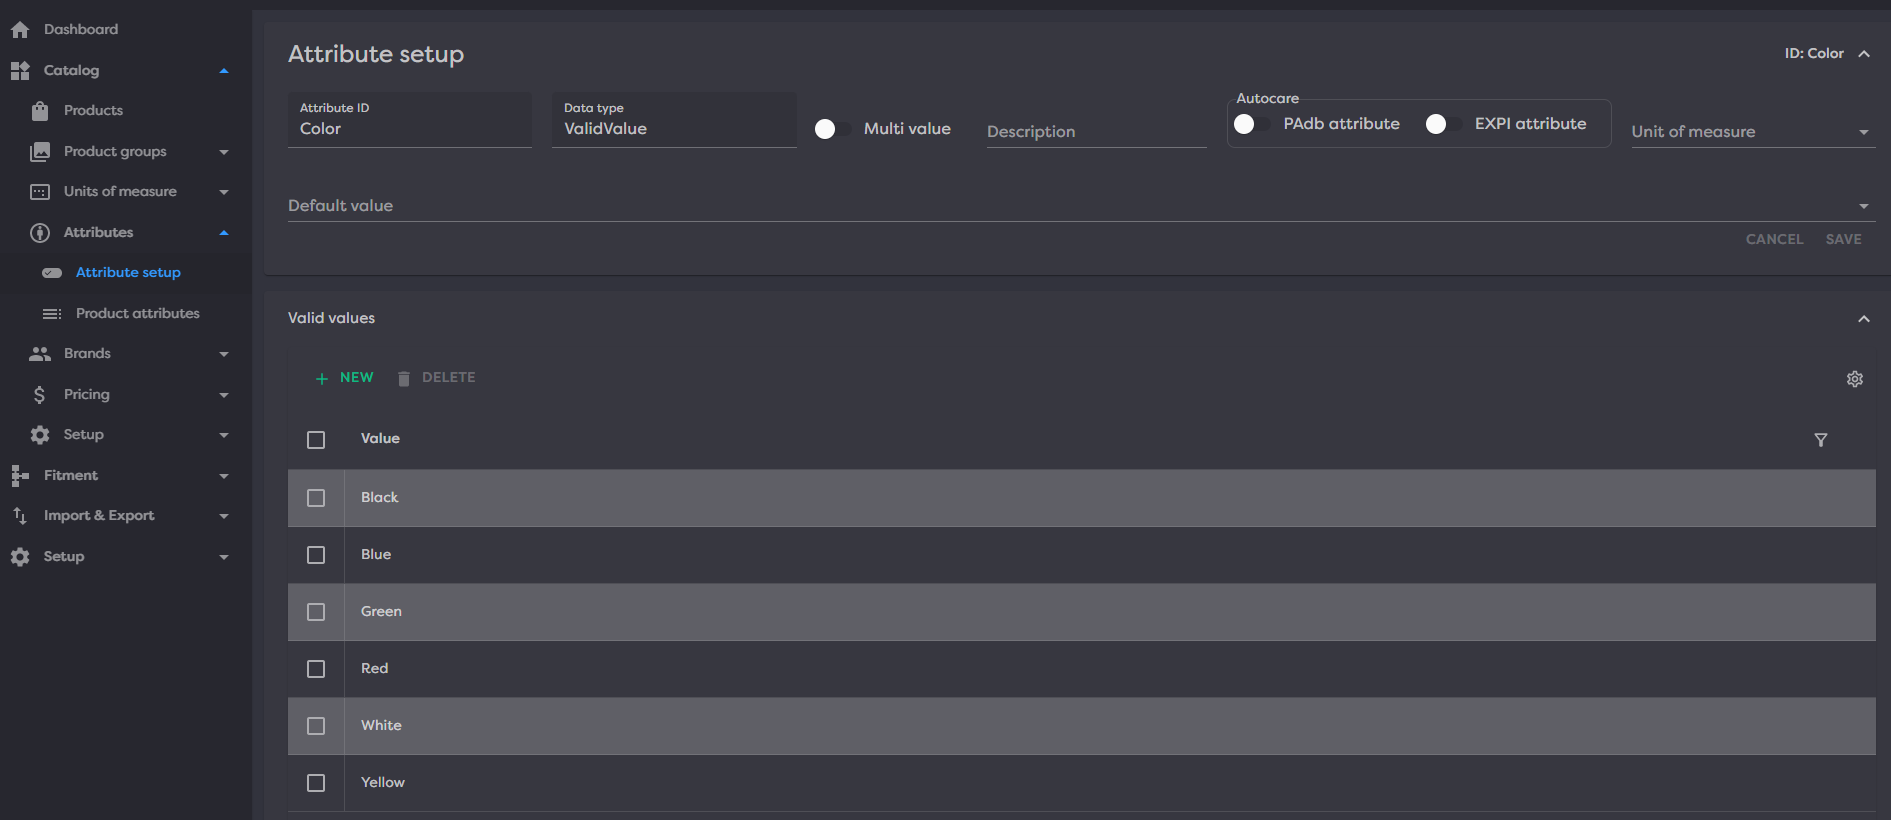
Attribute setups are used universally across the different attribute types to define certain characteristics of an attribute. First, an attribute setup must be configured, then a value can be assigned. Attribute set-ups can be found by navigating to Catalog>Attributes>Attribute setup. Create an attribute by clicking the NEW button at the top right.

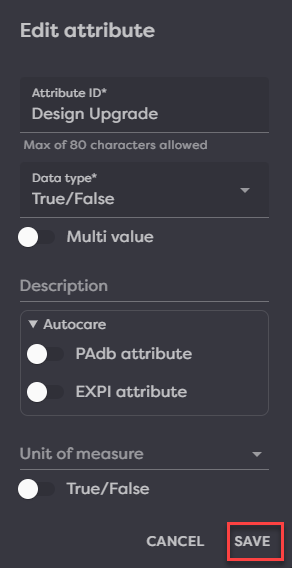
When configuring an attribute setup, at a bare minimum an Attribute ID and Data type will need to be defined.
The list of possible properties:
- Attribute ID (required, must be unique)
- Data Type (required)
- Description
- PAdb attribute - Defines whether the attribute adheres to the Parts Attribute Database standard defined by AutoCare
- EXPI attribute - Defines whether the attribute represents a Extended Product Information attribute defined by AutoCare
- Unit of Measure
- Default Value
It's important to note that the Data type of an attribute will dictate what attributes can be set as values. For example if a "Whole Number" field is set, text values won't be accepted. If a rigid data type is not required of the attribute "Text" data type is a safe default.
Attribute setups can also be edited by clicking the pencil icon in the “Edit” column. Most properties can be edited besides the attribute ids and data types which can only be specified on create.

Once you edit the attribute, click SAVE.
¶ Default Value
Within the attribute setup, a Default Value can be defined. This simply defines a value used if no value is defined. When creating a new attribute value with a default value specified, the value field will pre-populate with the default value. Default values can also be edited from the edit dialog.
¶ Valid Values
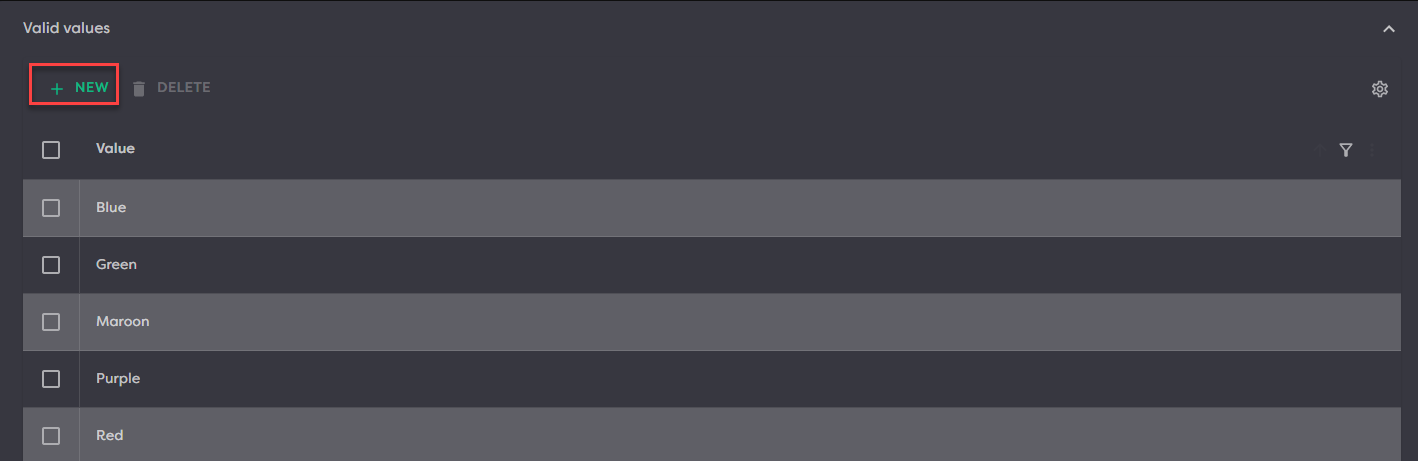
One of the data types supported in Product Desk is Valid Values. Valid Values describes a data type in which attribute values can only be populated via the value from a user defined list. Valid values can be defined in Product Desk by going to the attribute setup details. If the valid value data type has been selected a grid will appear in a "Valid values" expansion panel.
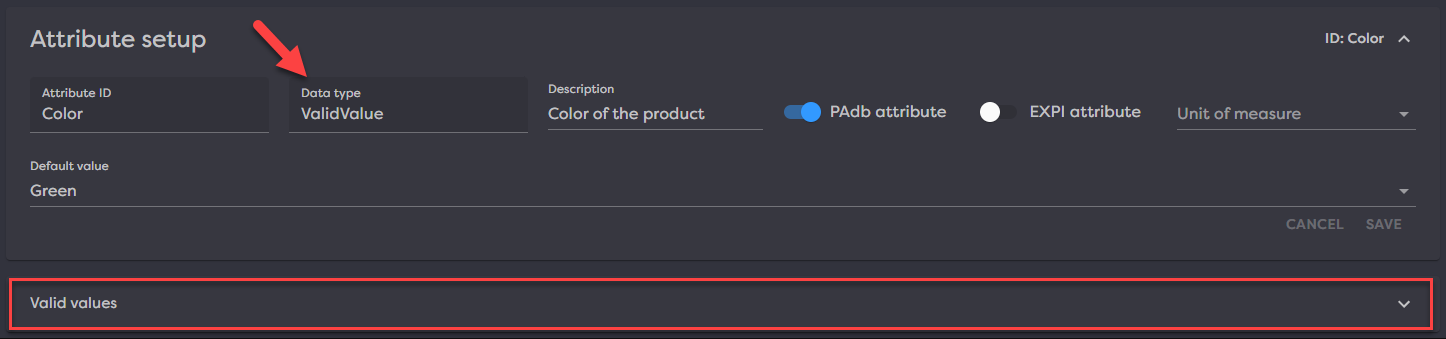
Valid values can be created and deleted within the grid.
¶ Attribute Setup Details
Each attribute setup has a details page which can reached by clicking the hyperlinks within the attribute setup grid.

The details will display the attribute setup properties as well as a list of Valid Values if any are present.
¶ Product Attributes
Product specific attributes can be configured by navigating to Catalog>Attributes>Product Attributes. This is where your attributes can be set directly onto products. It's important to note that an attribute setup must first be configured before an attribute can be associated with a product. At a minimum an attribute setup, a product and a value must all be defined to create an attribute value. You can assign a product attribute by clicking NEW in the top right.
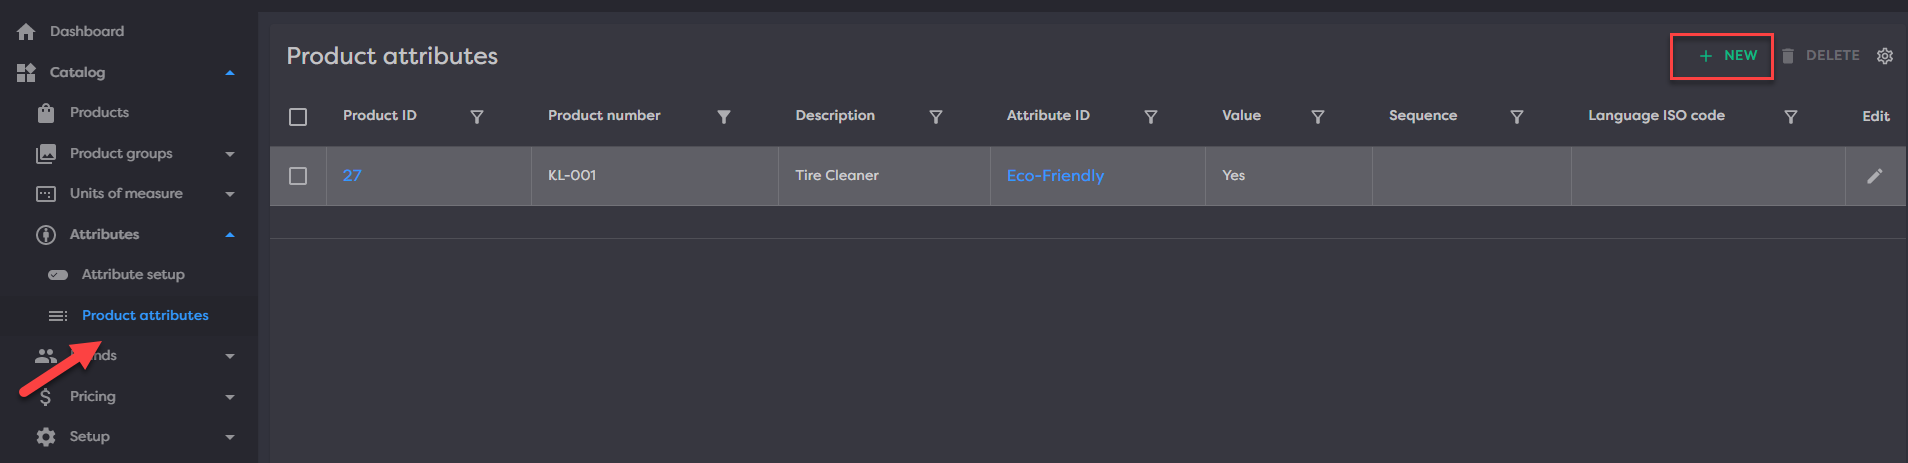
This will open a modal for you to pick the product you want to add an attribute to, select the attribute ID you will be adding to that product and assign the value for that.
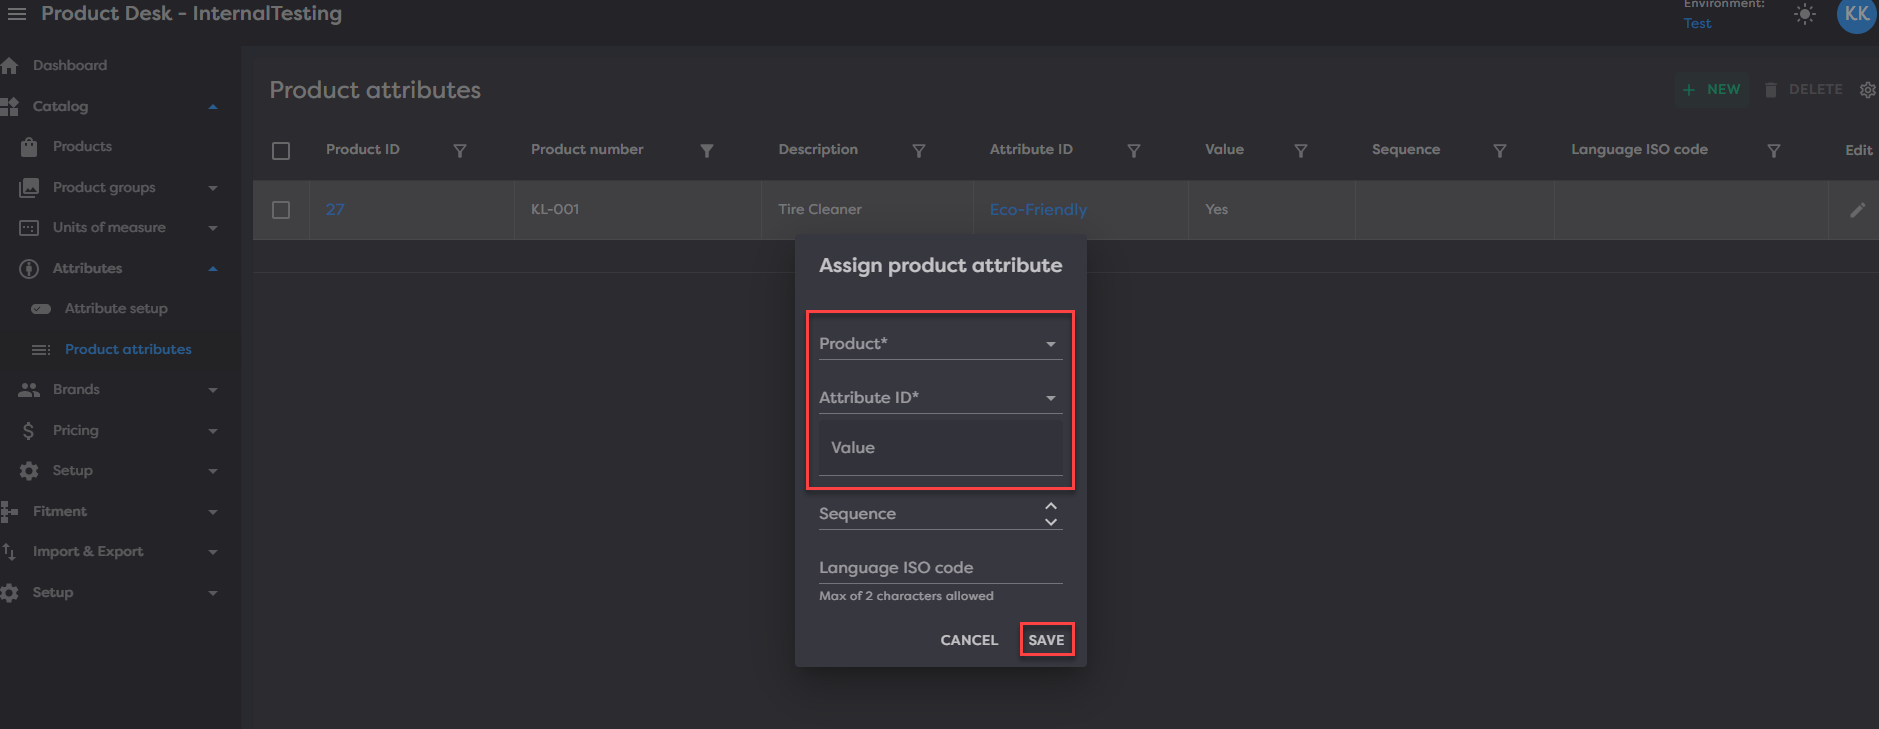
Note: Value field won't be editable until an attribute ID is selected, as the value field depends on the attribute setup data type.
There are several fields which can be configured on creation of the Product Attributes:
- Product Id (required)
- Attribute Id (required)
- Value (required)
- Sequence - Used for sequencing multi-part attributes
- Language ISO Code - Specifies the language of the attribute value
¶ Brand Attributes
Attributes can also be set on brands. An attribute setup still needs to be configured in order to set an attribute on a brand. Brand attributes can be set by navigating to Catalog>Brands>Brands and going to the brand details page.
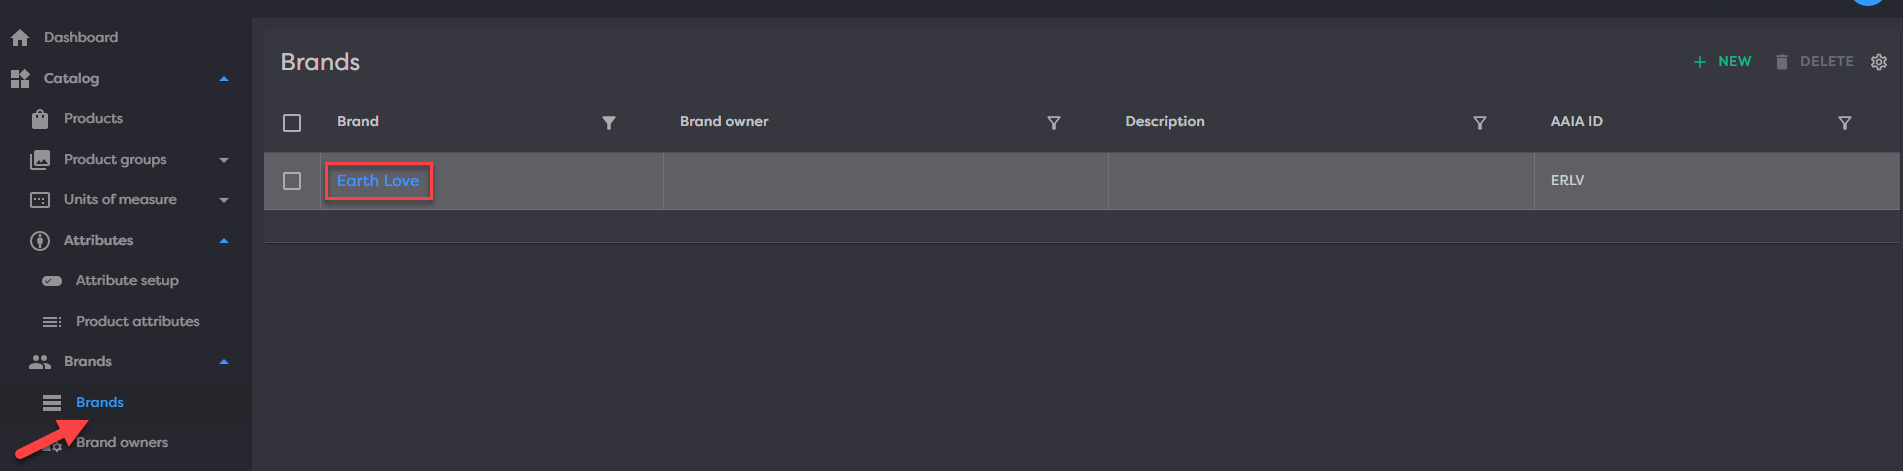
Once in the brand details page, expanding the Attributes expansion panel will display all the attributes on the current brand. Attributes can be created, edited and deleted from this grid.

¶ Group Attributes
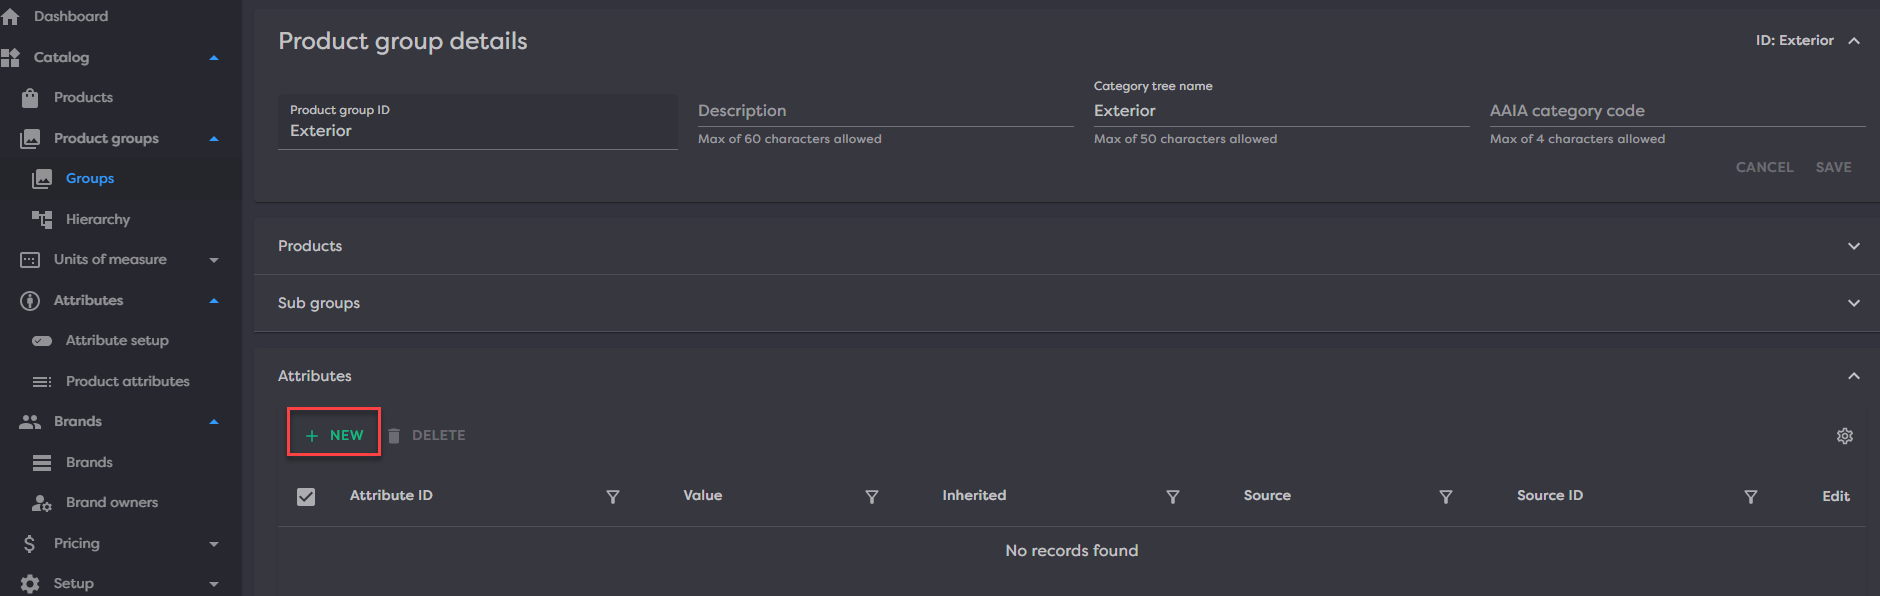
Attributes can be set on groups of products. To set an attribute on a group, a group must be created as well as an attribute setup. Once both of these are created, navigate to the Product Group detail page by going to Catalog>Product groups>Groups and select a hyperlinked Product group ID.
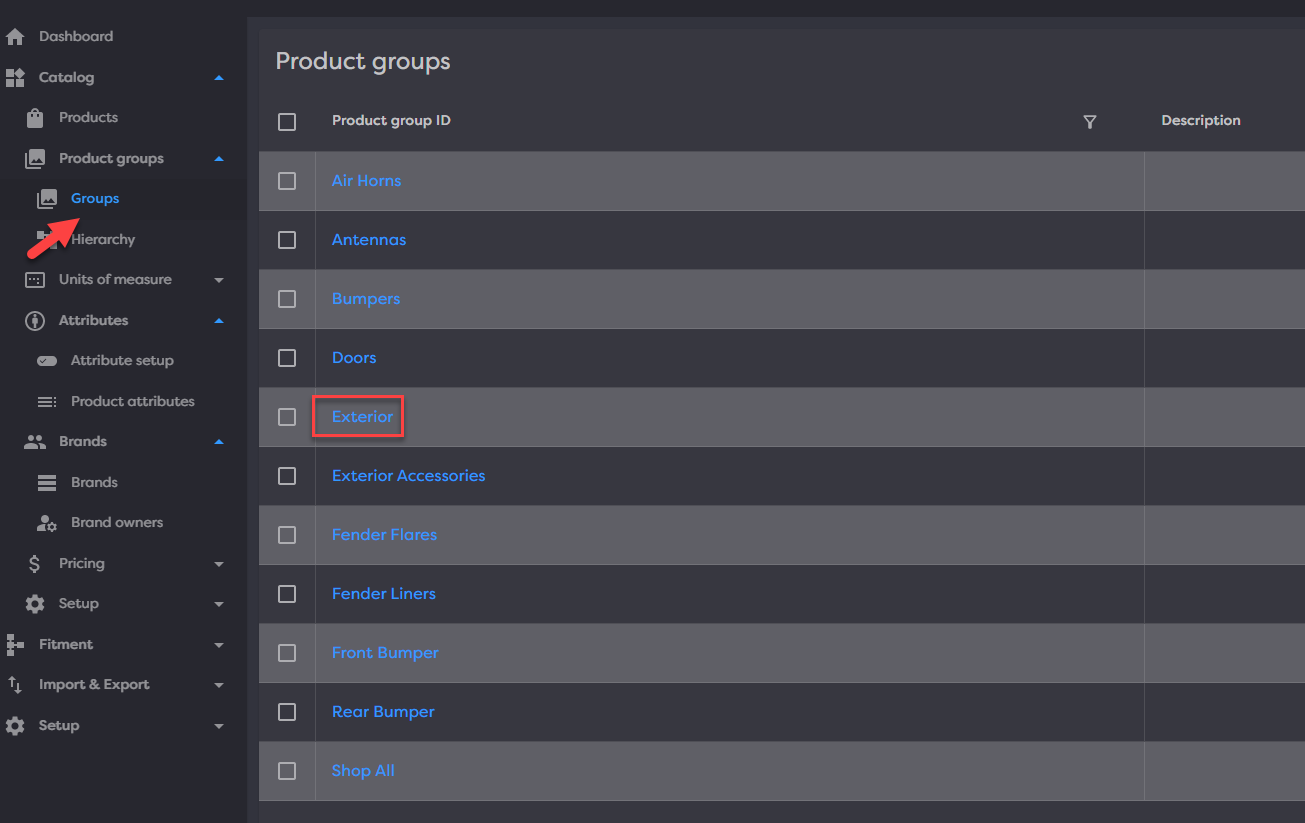
Once in the group details page, expanding the Attributes expansion panel will display all the attributes on the current group. Attributes can be created, edited and deleted from this grid.
¶ Brands
- Create/manage brands
- Create/manage sub brands
- Assign attributes to brands
- Link Brands and products
¶ Brands
bbb
¶ Brand Owners
Owners…
¶ Pricing
Pricing…
¶ Prices
Prices…
¶ Price lists
Price lists…
¶ Price types
types…
¶ Setup
The Setup area is where you will want to begin before importing or creating any new products. From here, you will define some basics about your data.
¶ Container types
Container types allows you to define all the ways you sell or distribute your products. Multiple container types can exist. Maybe you sell everything individually in eaches or by the gallon, box, pallet, drum, etc. Define those container types here.
To create a container type, click New in the top right. Then complete the fields, only Name is required, then click Save.
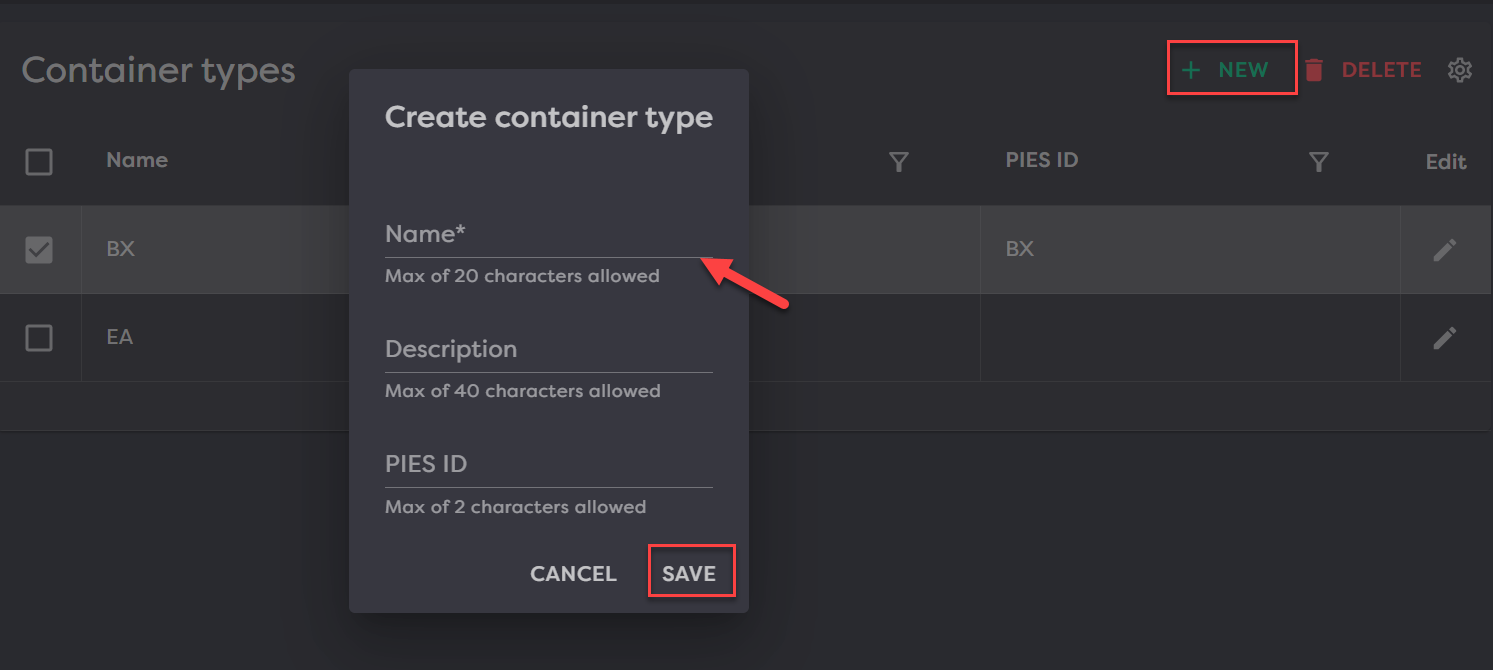
Available fields:
- Name (required)
- Description (optional)
- PIES ID (optional)
¶ Part terminologies
In this section, you will want to define all Part Terminologies you plan to import into your instance from PIES. If the Part terminology is defined here, then when a PIES file is imported, any product with that part term will be brought into Product Desk.
To add a part term, click New in the top right, fill in the required fields and then click Save.

Available fields
- Part terminology ID (required)
- Name (required)
- Description (optional)
¶ Product relation types
Product relationships allows users to define cross references, using whatever types of relations they want: quality based alternatives, supersession, commonly bought with, etc.Define relation types
As a user, you first define all the different types of relations.
To do this, go to Catalog>Setup>Product relation types, click New in the top right, fill in the required fields and then click Save.
Available fields
- Name (required)
- Description (optional)
From here, you may navigate to Catalog>Products, click into a product and go to the Related products section to start adding relationships.
¶ Description types
In this section, you will want to define all descriptions you plan to import into your instance from PIES and/or add to your product through the UI. If the description type is defined here, then when a PIES file is imported, any product with that part term can be brought into Product Desk or when creating through the UI, you can add a description for it.
To add a description, click New in the top right, fill in the required fields and then click Save.
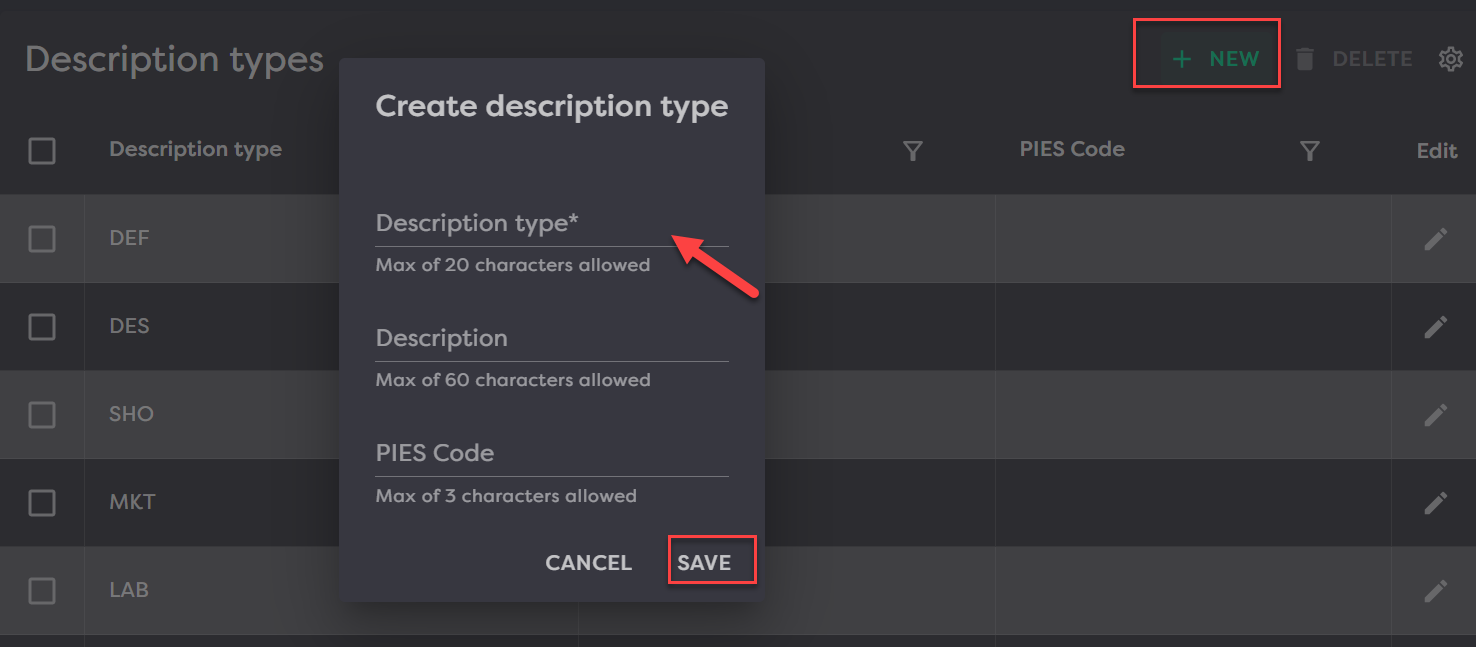
Available fields
- Description type (required)
- Description (optional)
- PIES Code (optional)
¶ Descriptions
From here, you can see and manage all descriptions across all products.
To add a new description to a product, click New in the top right, fill in the fields and Save.
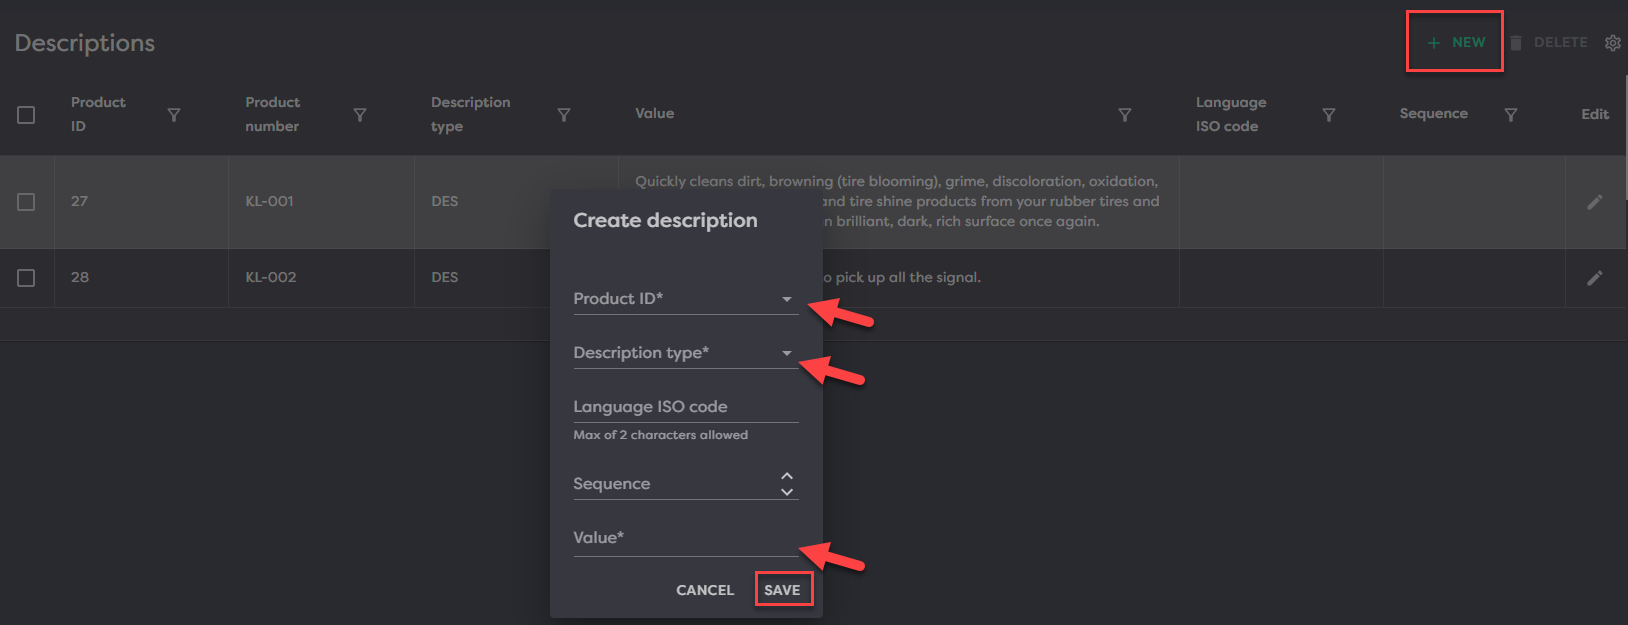
Available fields
- Product ID (required) - this is made up of the Product Desk generated ID + your Product Number
- Description type (required)
- Language ISO Code (optional)
- Sequence (optional)
- Value (required)
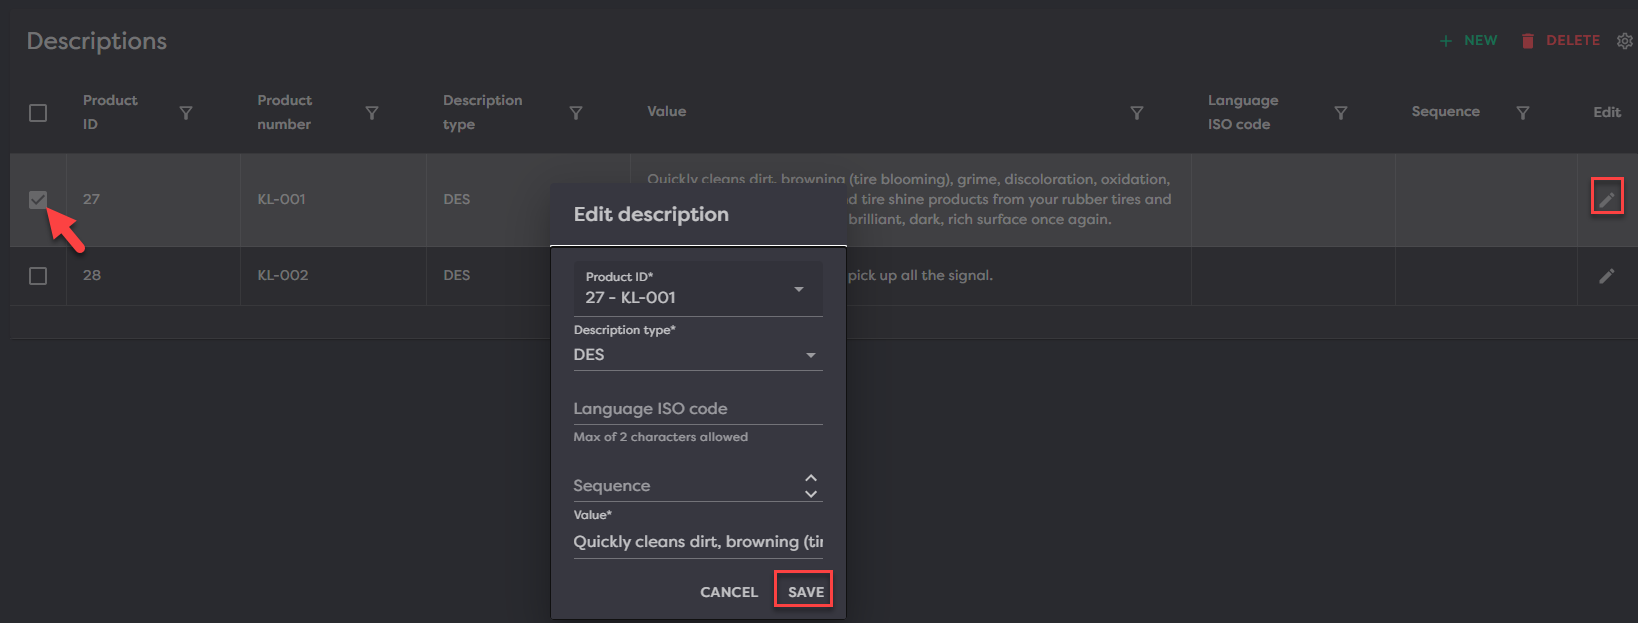
To edit an already existing description, checkmark the box in the first column of the product/description you want to edit and then click the pencil icon on the far right to open the edit modal. From here, edit the fields you desire and click Save.
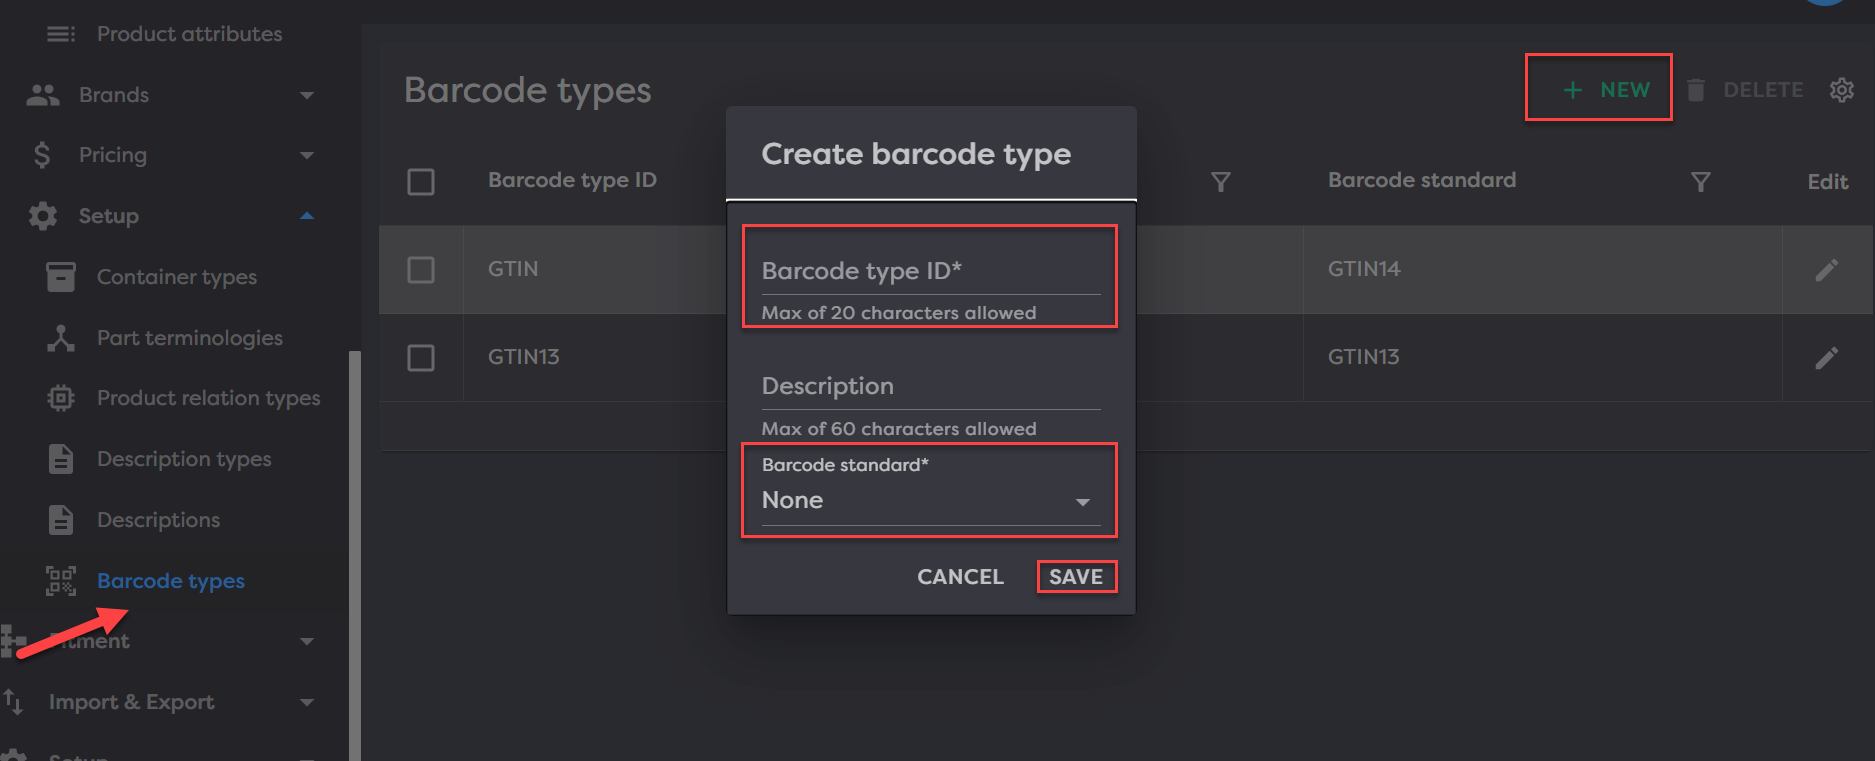
¶ Barcode types
Barcode Types are a list of barcode standards to enforce validation against.
Barcode types include:
- GTIN-12
- AKA UPC-12
- 12 digits
- Only numbers 0 through 9
- GTIN-13
- AKA EAN/UCC-13
- 13 digits
- Only number 0 through 9
- GTIN-8
- AKA EAN/UCC-8
- 8 digits
- Only number 0 through 9
- GTIN-14
- AKA GS1-128 or ITF-14
- 14 digits
- Only number 0 through 9
To set your barcode types navigate to them by going to Catalog>Setup>Barcode types. You can add a type by hitting NEW in the top right. Then Complete the required fields of barcode type ID and barcode standard and hit SAVE.